| Home | | Dry Erase | | Dry Erase-Plus Skins | | Dry Erase Grids / Logos | | Dry Erase-Plus Paint | | Movable Walls | | Services | | Site Map - Site Search| | Contact Us |
Dry Erase-Plus Overlay Installation Guidelines
Thank you for your purchase of our Dry Erase-Plus ™ product.
You have made a wise and economic choice that will be enjoyed by many for years to come.
JML’s Dry Erase products are versatile in both use and installation. Up to 100' long!
For these instructions without pictures, click here.
Daily Cleaning: Use a soft cotton cloth or similar eraser to remove all unwanted dry erase markings, crayon markings, and the like. If there are dry erase markings that have become too hard for an eraser, simply mist the markings with regular tap water to and wipe clean.
Deep Cleaning: Use a water dampened soft cotton cloth to remove dry erase markings and most water-based residues; use isopropyl to remove permanent marker and most oil-based residues. If you encounter a marking that you are having some difficulty in quickly removing, please call us toll-free so we can assist you in quickly cleaning your Dry Erase-Plus surface.
Note: Regular dry erase board cleaners are not needed! These cleaners may leave residue on your state-of-the-art Dry Erase-Plus surface and inhibit the ease of writing and erasing. The use of such cleaners will not harm your Dry Erase-Plus surface, use a water damp cloth to remove any residue if needed.
Overlay Skins
Notes:
The transparent overlay skin is 4 mils thick which is about twice as thick as competitive surfaces. It is also flexible enough to be rolled and will easily contour to your room's inside and outside corners. The surface is also available in white and with a magnetic backing (see below for additional information on installing magnetic surface and on installing over existing dry erase boards and chalkboards). Notice: JML Products and Design, it's employees, agents, and owners are not responsible for damages and/or injuries resulting from handling, installing, or using any products or materials supplied, recommended, or used. These instructions are for installations over existing stable materials that can accept the additional weight and use of the product. These are only guidelines and do not cover all circumstances or potential events. If you have any concerns or if you are not fully aware of potential dangers, please contact a qualified installer. If the terms in this installation guide are not agreeable, return the undamaged materials and supplies for a full product refund.
We recommend reviewing the instructions and calling the toll-free help-line with any questions at least 24 hours before installation.
Please inspect contents before accepting shipment. Note all crate and content damage on the delivery slip before signing. If you are unable to inspect before signing please write "Accepted Sight Unseen" on the delivery slip. All shipments are insured against shipping damage; contact JML prior to installation if you see any shipping damages.
Our crating is designed to both protect the product and to help the environment. Please reuse the crating / tube if possible. The product and crating / tube may have sharp edges thereby requiring the use of gloves throughout the uncrating and installation process. Please use caution when using any power tool like power screwdrivers.
Please exercise extreme caution and awareness during any installation project.
Dry Erase Skin Overlay
Tools needed: Cordless power screw driver, screw bits, soft cotton cloth, j-roller or plastic flat edge applicator, tape measure, pencil and non-marking eraser (or painter's tape, or light laser markers), sharp retractable safety utility knife (to cut skin), safety eyewear, and cotton gloves (to protect hands from product edges).
This installation is 14' 6" long and took approximately 20 minutes with two novice installers following these instructions.
1. Remove any trim work without affecting the attachment of the existing boards. Be aware if the trim attachment is used as support. (If the surface is magnetic, in addition to the adhesive, drill through the product at one foot (30 cm) intervals around the edge while installing, and use screws to mechanically fasten the surface to the wall/board. Be aware of any electrical, plumbing, or other structures that may be encased in the wall. Correct existing divots in the board or wall. For magnetic, existing whiteboard and chalkboard installation see notes after this section.) If you are painting the existing surface for a specific dry erase board color, allow paint to fully dry and cure before installation. See paint manufacture guidelines for curing times. Make the application area smooth, clean, and dry prior to installation. Contact JML for additional tips on outdoor installations.
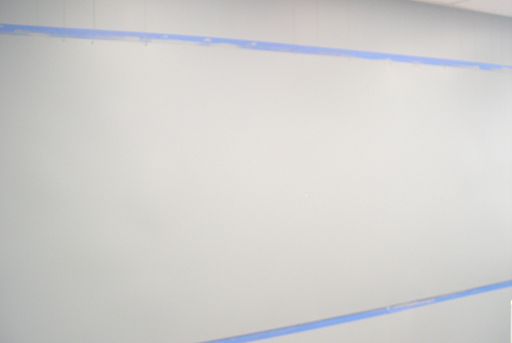
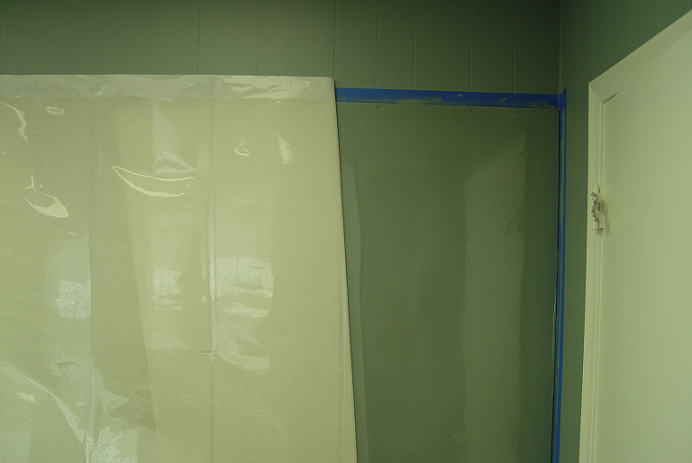
2. Mark on the wall the starting location on the top (or bottom) and on the end with an erasable pencil, tape (shown here), or with light lasers. For wall-to-wall applications, leave approximately 1/2 inch on the beginning edge to press this into the corner and later trim (step 5).
3. Align about 4 feet (1.5 meters) of the skin with the backing still attached. For installation on chalkboards, existing dry erase boards, glass, plastic, and metal sheeting... you may mist these surfaces with a glass cleaner containing ammonia (like Windex) to assist in installing the dry erase skin.
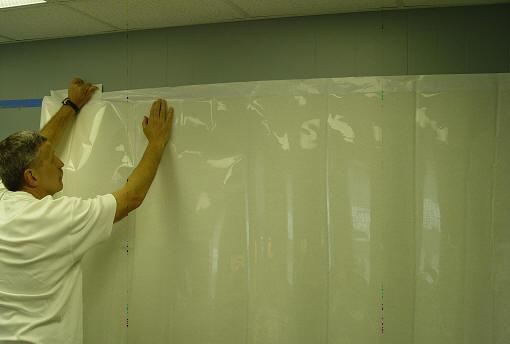
4. Without touching the adhesive, peel back about 2 inches (5 cm) of the backing and align the skin with the markings.
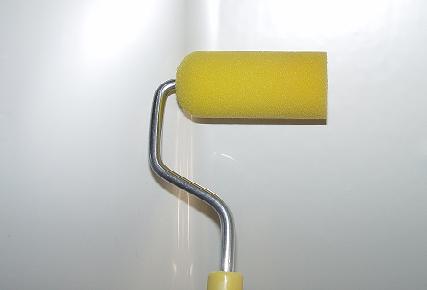
Painted Surfaces: Use the straight end of Application Roller toward any corners or moldings and the rounded end toward the product that you are ready to apply. Having the release liner peeled back about 2 inches (5 cm), pressing firmly, simply roll the sponge applicator over the surface onto the wall/board. (Or, using a soft cotton towel, firmly press the surface onto the wall/board using small circular motions. Each circular motion should be firm and about the size of a thumb print. Half of the small circular motion should begin on already applied product and half of the circular motion should be on un-applied product. Start from the top of the surface and work you way down.) Continue applying the surface to the wall/board by repeatedly peeling back about 2 inches (5 cm) of the backing and rolling (or rubbing) the surface onto the wall/board. Always use the applicator to press the skin onto the wall/board surface so the application will be without air bubbles. Work up to the release liner without pressing on the release liner. Note: the sponge roller applicator (available through JML) or the cloth applicator are recommended for the best installation, other applicators made of plastic or rubber can leave residue on your surface.
For installation on chalkboards, existing dry erase boards, glass, plastic, and metal sheeting where glass cleaner with ammonia (like Windex) is used: use squeegee from the center up and then from the center down, removing any liquid and air under the surface.
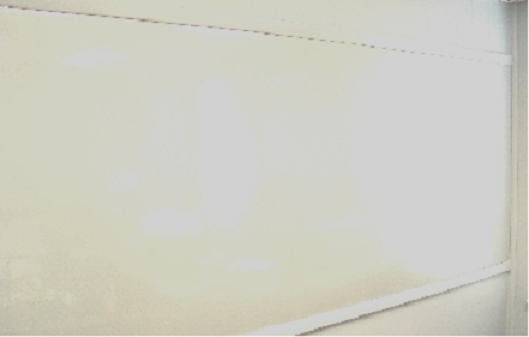
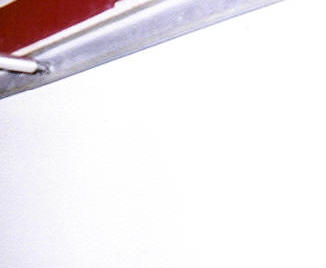
As you can see in the close-up pictures below, installation is 100% contact with zero air entrapments. Simply beautiful!
Notice how the pre-applied adhesive holds this end in place after only about 12 inches (30 cm) is installed!
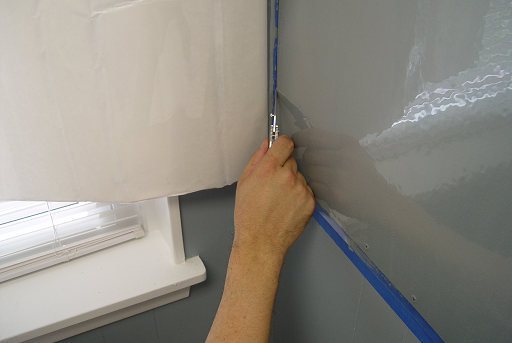
5. Trim Edges. You can use a sharp utility knife to trim the skin at exactly the desired location.
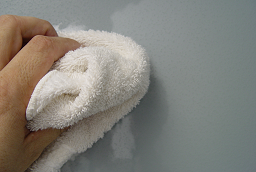
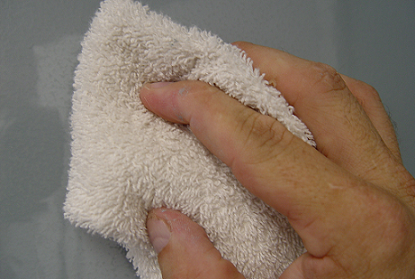
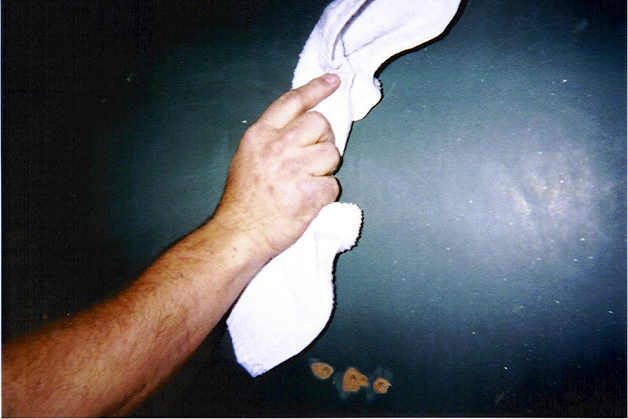
6. Wipe the surface with a water damp cotton towel and then buff the surface with a dry cotton towel to remove any shipping residue. (Residue on the surface may cause markings to stick or bead up)
7. Enjoy the Best Dry Erase Surface Available!
Magnetic Board Overlay
The following steps are easily completed by two physically able, qualified, and knowledgeable individuals using the supplied materials, the listed tools, and installing over a clean and dry chalkboard or similar surface. The volunteer crew in the pictures below found the install quicker and easier than the removal of an old board and putting up a new one.
Caution: Since you will be working on an enclosed wall, be aware of electrical, plumbing, and other components in the wall before drilling so these objects are not disturbed or otherwise compromised. Remember that the magnetic dry erase board contains a metal backing and will conduct electricity that may or will result in harm or death. Electrical cords are not recommended during this installation process. Notice: JML Products and Design, it's employees, agents, and owners are not responsible for damages and/or injuries resulting in handling, installing, or using any products or materials supplied, recommended, or used. These instructions are for installations over existing stable materials and open wall cores. These are only guidelines and do not cover all circumstances or potential events. If you have any concerns or if you are not fully aware of potential dangers, please contact a qualified installer. If the terms in this installation guide are not agreeable, return the undamaged materials and supplies for a full product refund.
We recommend reviewing the instructions and calling the toll-free help-line with any questions at least 24 hours before installation.
Please exercise extreme caution during any installation project.
Cutting the product:
Tools needed: Gloves, Protective Eyewear, Retractable Knife, Circular Saw with a combination blade.
If the surface is magnetic without a backing board, cut the metal and surface with at the same time with a metal sheer.
If the skin is mounted to a board, cut the skin with a retractable knife at least 1/8" back from the desired cut on the board and remove the cut skin so the saw will not cut the skin. Cut the metal and board with a combination circular saw blade so that the blade will cut the metal before cutting the board.
Tools needed for installation: Cordless power screw driver, screw bits, a counter-sink bit (or a similar device for flush mounting screws), stud finder, caulking gun, flat blade for smoothing glue, knife (to open the tube of adhesive), safety eyewear, and gloves (to protect hands from board edges).
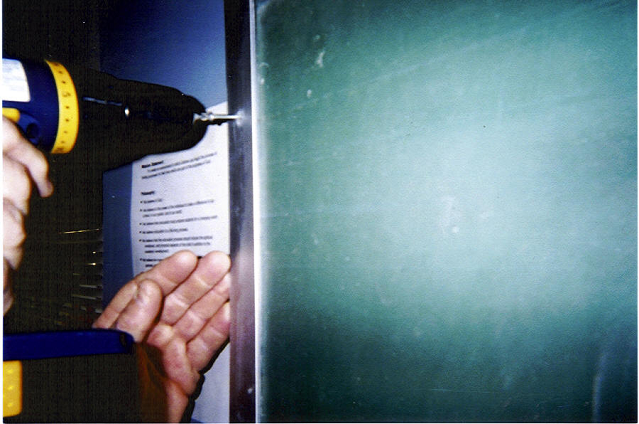
Step 1
Secure the existing chalkboard flat against the wall using screws into counter-sink areas so that the screw heads are flush or below the chalkboard surface. (Step number 1 may be optional if the chalkboard is flat and secure against the wall without the molding pieces around the chalkboard. Use appropriately long screws to correctly enter the wall's studs. Note: The dry erase board will cover the existing chalkboard surface; therefore, any screw heads on the chalkboard surface will not be accessible for the screws to be removed at a later time; an alternative is to add additional screws into the wall studs during step 5 to better secure the board. The dry erase overlay will look and function at its best on a smooth and flat (non-bowed) surface.) If the chalkboard is flat, attach additional screws into the wall studs to accommodate the additional dry erase board weight if needed; this may also be achieved in step 5 by using a length of screw long enough to securely enter the studs when mounting the parameter of the dry erase board. (If the chalkboard has a spline over the edges of two chalkboard pieces butted together and you wish to remove it to overlay a single dry erase surface, carefully remove the spline so the chalkboard surfaces are not gouged or damaged.) Caution: The chalkboard must be secured against the wall without the support of the screws holding the molding in place before proceeding to step 2. Estimated time 5 minutes*.
Step 2
Remove molding around secured chalkboard. Note: the chalkboard must be securely in position without the support of the molding screws before the molding is removed. Estimated time 3 minutes*.
Step 3
After filling in any holes or gouges, wipe down the board to remove any dust or oily residue. Cover all exposed screw heads with adhesive to minimize any screw-head movement. (If there is a gap from a removed spline, fill the gap with the adhesive.) If you are painting the surface to a specific color, be sure the paint is cured before continuing. The existing board surface needs to be smooth, clean, dry, and stable. Estimated time 4 minutes*.
Step 4
Continue with the installation as shown above in "Dry Erase Skin Overlay".
Step 5 Additional step for magnetic surfaces.
Drill through the skin and the metal before installing screws. Screw one upper corner of the magnetic dry erase surface to the correct position on the chalkboard. Install the screws approximately 12" - 16" apart around the perimeter of the magnetic dry erase surface into the chalkboard. Attach the screw into the area that will be covered by the molding. Estimated time 3 minutes*.
Step 6
Attach the molding with screws. Caution: all edges must be covered by molding to protect from injury, even if molding was not originally on the chalkboard. Estimated time 4 minutes*.
Step 7
Wipe the surface with a water damp cotton towel and then buff the surface with a dry cotton towel to remove any shipping residue. (Shipping residue on the surface may cause markings to bead up. The residue can be removed by rubbing the surface with a soft cotton cloth.)
Step 8
Excellent job! Enjoy your premium quality Dry Erase-Plus™ Dry Erase Board!

*Based on installing a 3 1/2' x 16' dry erase board. The estimated times may take longer on first time installations or on non-screw trim, irregular trim, missing molding/trim, or irregular chalkboard surfaces.
For a picture-less printable version click here.
| Home | | Dry Erase | | Dry Erase-Plus Skins | | Dry Erase Grids / Logos | | Dry Erase-Plus Paint | | Movable Walls | | Services | | Site Map - Site Search | | Contact Us |
About Brochures Ceramic on Steel Chalkboard Replacement Clean Dry Erase Convert Chalkboard to Dry Erase Dry Erase Boards Distributors Dry Erase Photo Gallery Dry Erase Plus Skin Dry Erase Pricing Dry Erase Overlay Dry Erase Paint Dry Erase Skin Dry Erase Skin Installation Guide Overlay Installation Guide with Pictures Dry Erase Pricing Dry Erase Selection Executive Summary Feedback Graphs, Grids, and Graphics Home Information Request Form Installation Dry Erase Wallpaper Installer Contact Form Links Magnetic dry erase Mastheads Movable Walls and Room Dividers Movable Wall Partitions Movable Wall Picture Gallery News Perlitecrete Porcelain on steel Price Savings Calculator Semi-Permanent Movable Wall Installation Services Track Partitions Wall Installation Website Inquiries Whiteboards
To contact us
Click on our Company Logo:

JML Products and Design
Manufacturer of
Dry Erase-Plus™ Dry Erase Skins, Dry Erase Overlays, Dry Erase Replacements, Chalkboard Replacements, Board Resurfacing, Writeable Mural Walls, Dry Erase Paint, Magnetic Dry Erase Boards, and Movable Wall Partitions Room DividersHome Office Dry Erase Boards... any size or coordinating color
School Dry Erase Boards... upgrade quickly and economically with one of our overlay products Preschool Early Childhood Centers Elementary Public Private High Schools Colleges and Universities Classroom Dry Erase
Office Dry Erase Boards... for that professional clean look after every erasing
Dry Erase -Plus Skins, Overlays, Replacement, and Upgrade is available in white and transparent.
Dry Erase -Plus is manufactured in the United States.
Dry Erase-Plus
™ is a trademark of JML Products and Design. Perlitecrete™ is a trademark owned by MichaelHeiman.Dry Erase -Plus is patent protected.
Dry erase paint for writable walls is patent protected.
Dry Erase-Plus™ Easy-read™
Manufacturer / Distributor
